Auvidea JN30D NVIDIA Jetson TX2NX/NANO
The Auvidea JN30D-TX2 requires flashing via a USB-C cable using the jetson-flash utilities from balena.
Boot device into recovery mode
We need to put the device into recovery mode. This is done by first locating the J32 pin block on the top of the board. The header block consists of 2 x 4 through hole copper contacts. Header #1 is marked by being square instead of round. To trigger the device to go into recovery mode one must short pins marked FR for "Force Recovery" on the backside of the board.
Once that is done, connect the device to your machine via USB-C and it should boot into recovery mode.
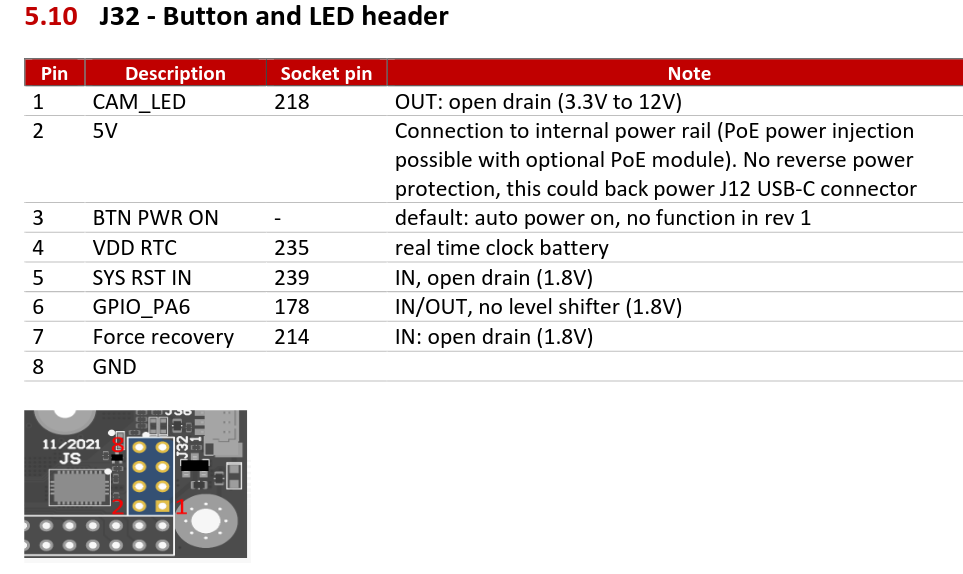
Board revisions might have different pin layouts
Be sure that the pins that are shorted are marked FR (Force Recovery) in the back of the board. The pin layout might depend on the revision model you have
Please check this video to see how to boot the device into recovery mode.
Please make sure that the connection between the FR pins is working properly (e.g. by pressing gently on the the cable contacts while resetting the device).
Flashing the Device
You need to have an
aivero-updatedeployment from Aivero to continue.Please contact Aivero for this.
At this point you need to have the DS running, openbalena running and have deployed the openbalena fleets.
See the relevant sections DS Install OpenBalena Install and Openbalena Fleet Deploy
You only need to run these next three steps when you get a new version of the DeepCore software.
-
Download the
flash-jetson.sh,configure-images.shandopenbalena-base-images.tar.gzto a common download folder (e.g.~/Downloads/flash-devices -
Determine your openbalena
SUPERUSER_EMAILandDNS_TLDfromcat /opt/aivero/open-balena/.env -
Determine the openbalena password:
cd /opt/aivero/open-balena && make showpass -
Navigate to the common download folder
cd ~/Downloads/flash-devices -
Run the following command once. When flashing a second device you can skip it.
chmod +x ./configure-images.sh ./configure-images.sh /opt/aivero/ds/self-signed-certs/certs/rootCA.pem <openbalena_domain> <openbalena_username> <openbalena_password> -
Run this command for every device you want to flash:
chmod +x ./flash-jetson.sh
./flash-jetson.sh
You can now reboot your Auvidea board and wait for the system to boot up.
You can check if the device shows up using watch balena devices
Updated 2 months ago