Recordings Management
Here we will show you how can schedule, create, delete and manage Recordings in your system.
Scheduling a Recording
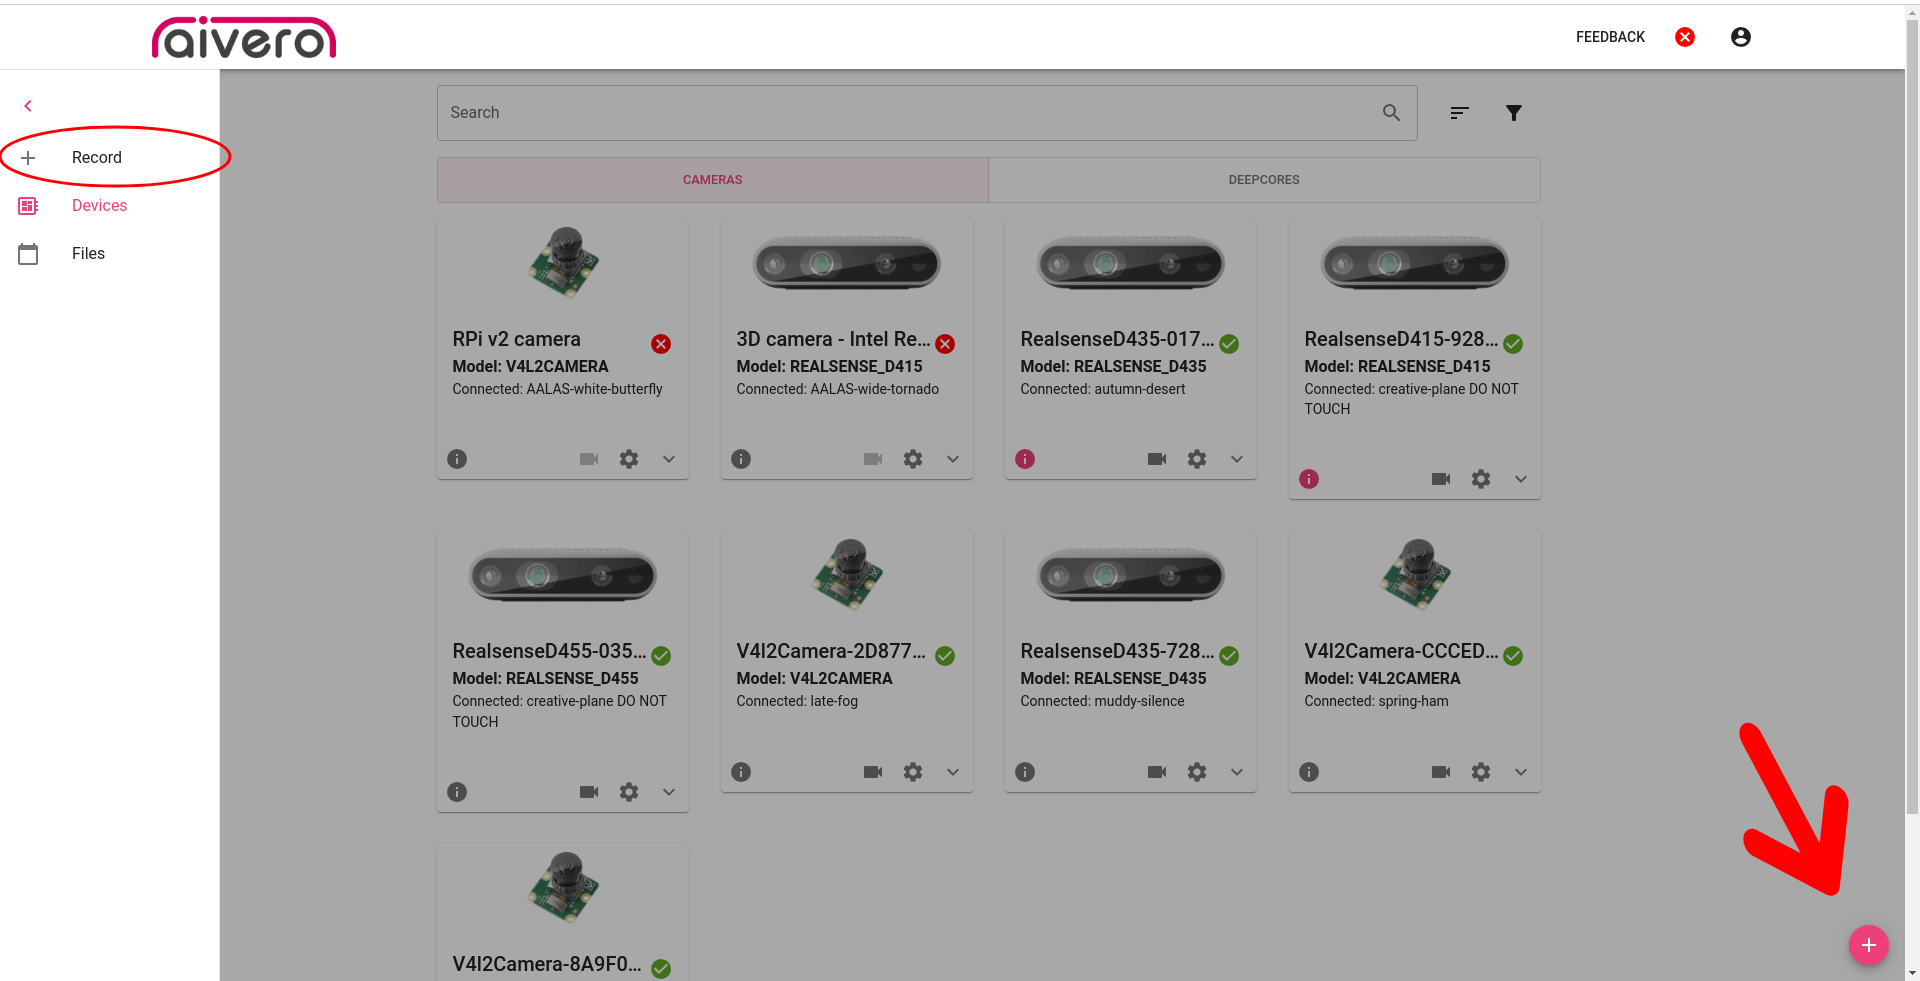
Figure 1
To access the recordings Overview management page we need to switch over by clicking the button marked with a red box in Figure 1 or the Record button in the side menu.
We are prompted with the following page in Figure 2.
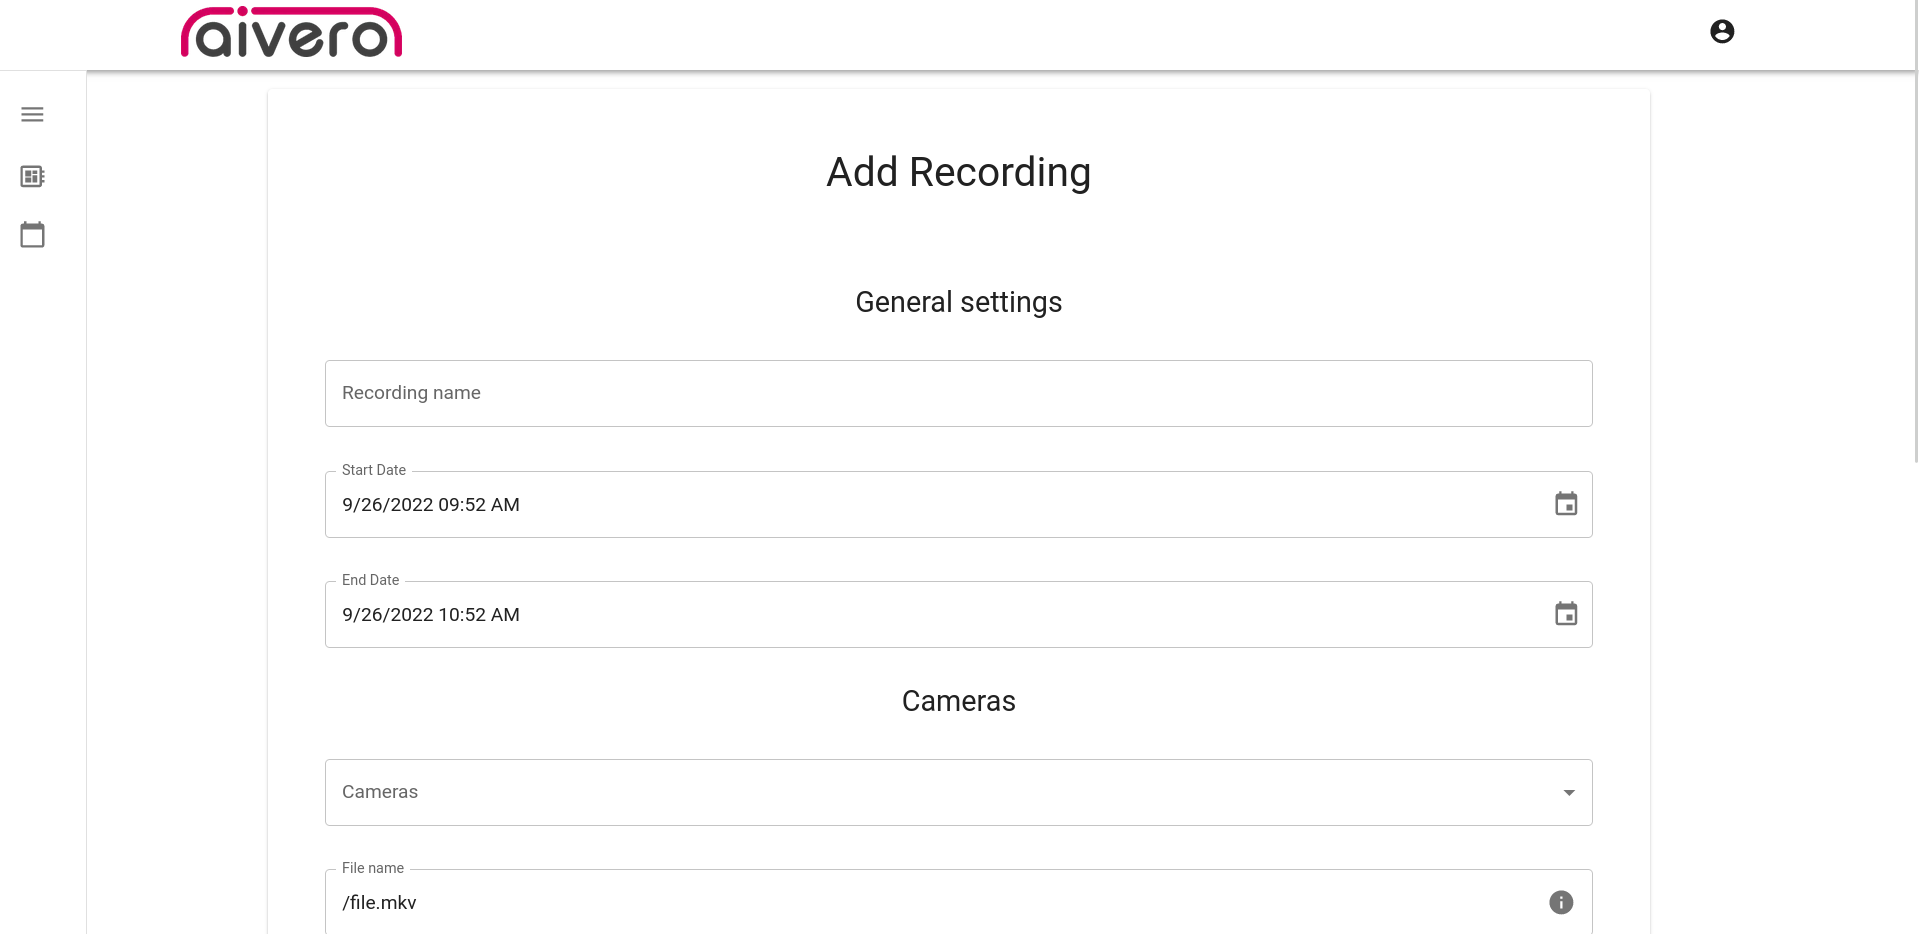
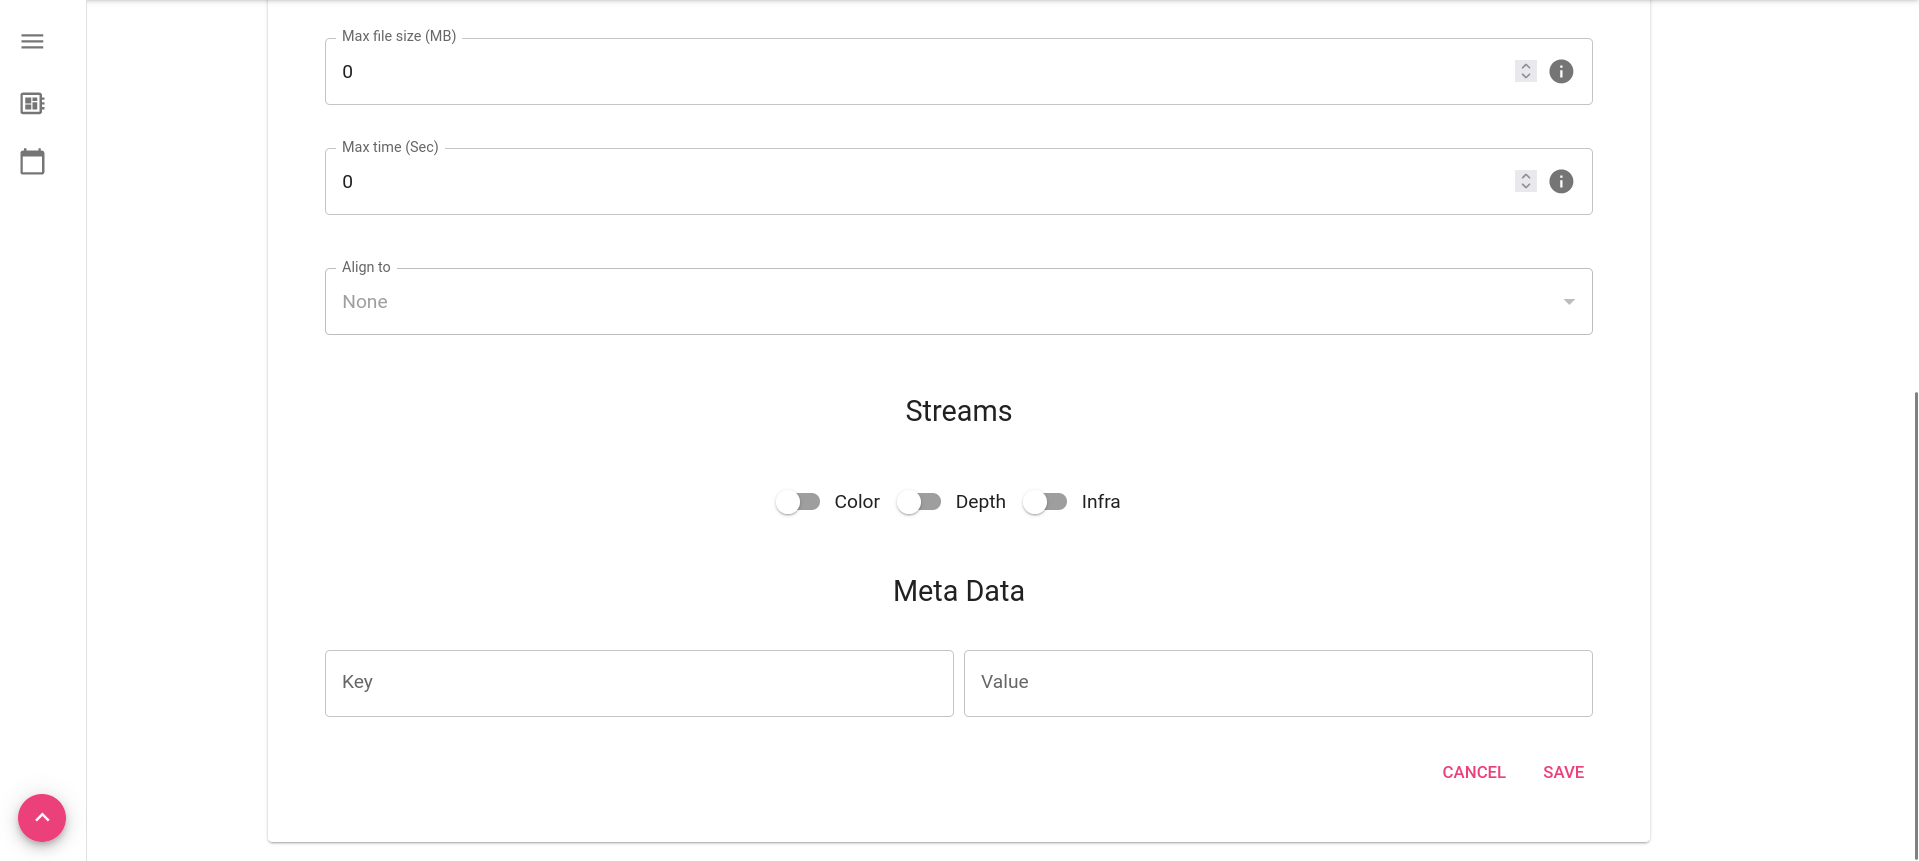
Figure 3
Here we are able to:
- Give a name to our recording using the
Recording name field. - Set
Start DateandEnd Date. - Select one or more cameras to be part of this Recording Session in the
Camerasdropdown menu. - Set a file identifier for the generated files with the
File Name field. - Set the max file size (in MBytes or seconds) and time (in seconds). This will set the system to create a new file once the first of these limits are reached in the currently recorded file.
- Select which streams should be recorded in
Streamstoggle buttons. - Set the options for each stream that is toggled on.
- Set if the streams should be aligned. E.g. for the alignment of the
Depthstream to the Color stream, please selectColorin theAlign to dropdown menu.
Once those are set we can click Save to schedule the recording.
List Available Recordings
By clicking in the button marked with a red box in the Figure 1 top left section we can see the recordings currently Scheduled to record in the system.
Once the recording session starts, we can click theIn Progress tab to see it.
After the recording has finished we can move over to theCompleted tab in order to see, not only the recording you just scheduled, but also the ones already present in the system.
Here we can interact with each of the recording sessions through the buttons marked in the red box in Figure 6.
Currently, it is possible to see the recording session details, download the recording session files to your machine, delete the recording session and add a note to the recording session. This note can be seen from the recording session Overview page.
Updated 2 months ago