Using the Aivero clipping tool
Aivero provides a clipping tool that can be used to preview and clip synchronised recording sessions
Installing the Application
- Before starting the application please install the following libraries:
sudo apt-get install libgstreamer1.0-dev libgstreamer-plugins-base1.0-dev libgstreamer-plugins-bad1.0-dev gstreamer1.0-plugins-base gstreamer1.0-plugins-good gstreamer1.0-plugins-bad gstreamer1.0-plugins-ugly gstreamer1.0-libav gstreamer1.0-tools gstreamer1.0-x gstreamer1.0-alsa gstreamer1.0-gl gstreamer1.0-gtk3 gstreamer1.0-qt5 gstreamer1.0-pulseaudio ffmpeg
- Then please allow file program execution by right-clicking it and toggling
Allow executing file as program.
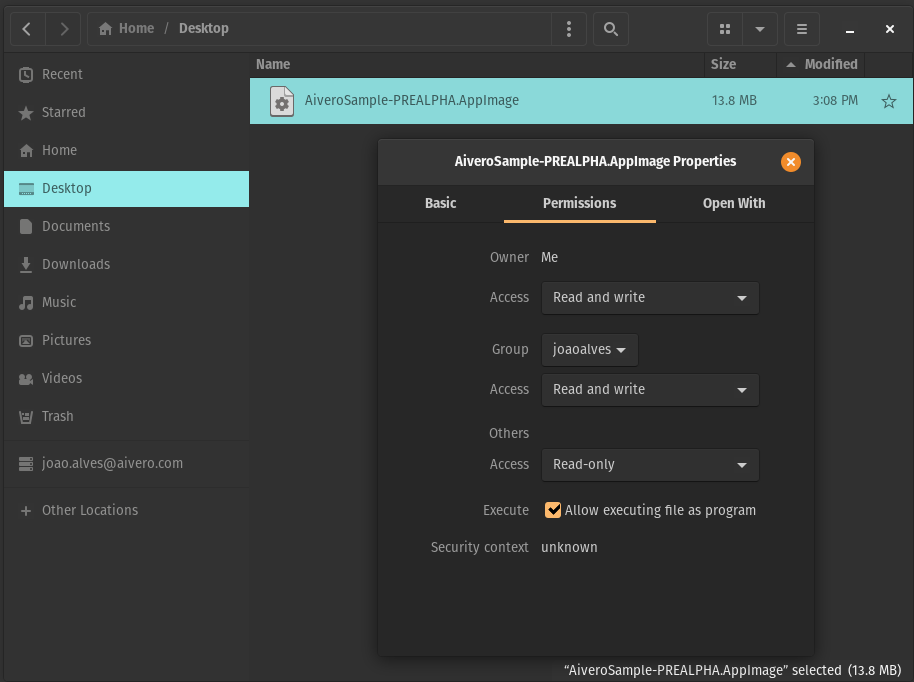
- Then by double clicking the file you should be greeted by the tool's GUI.
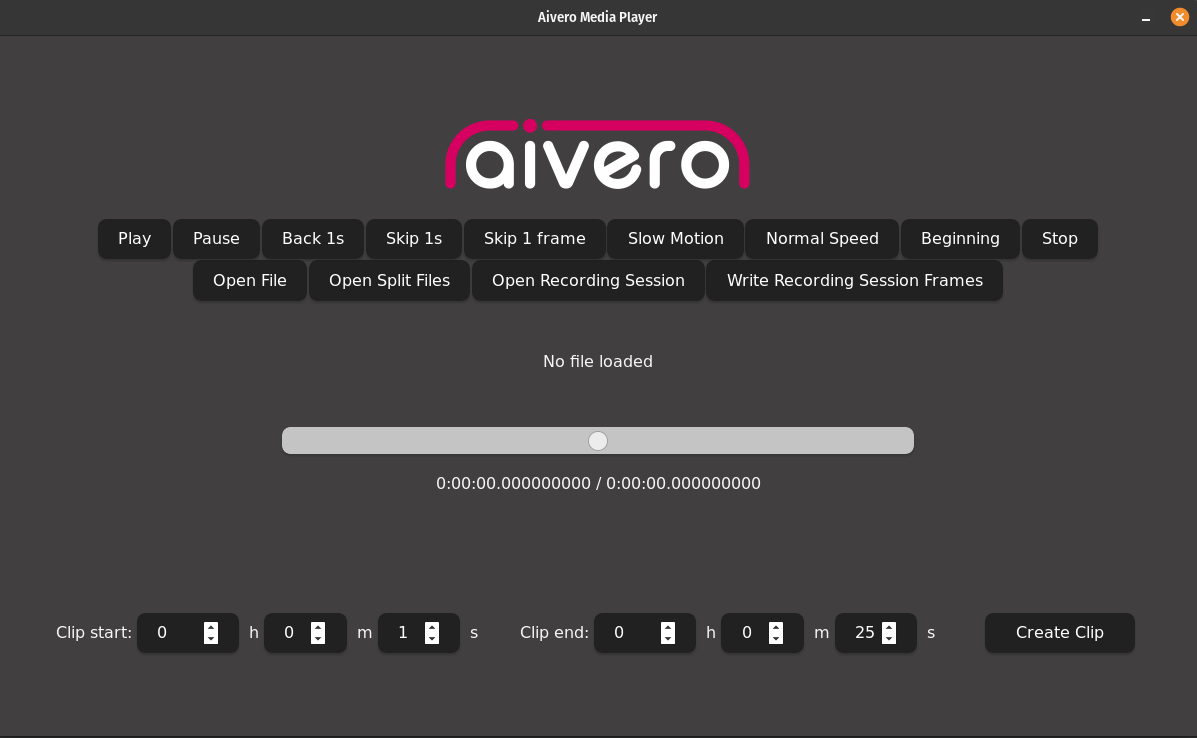
Opening a recording session
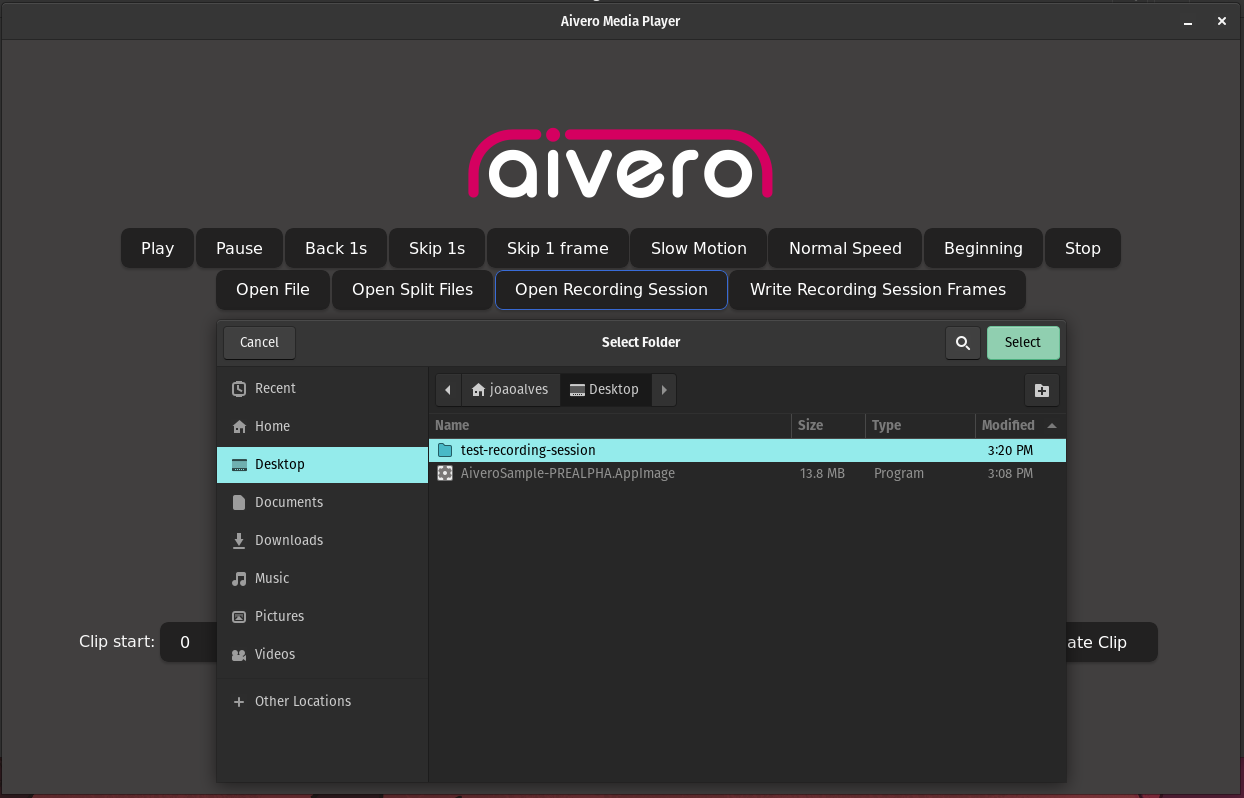
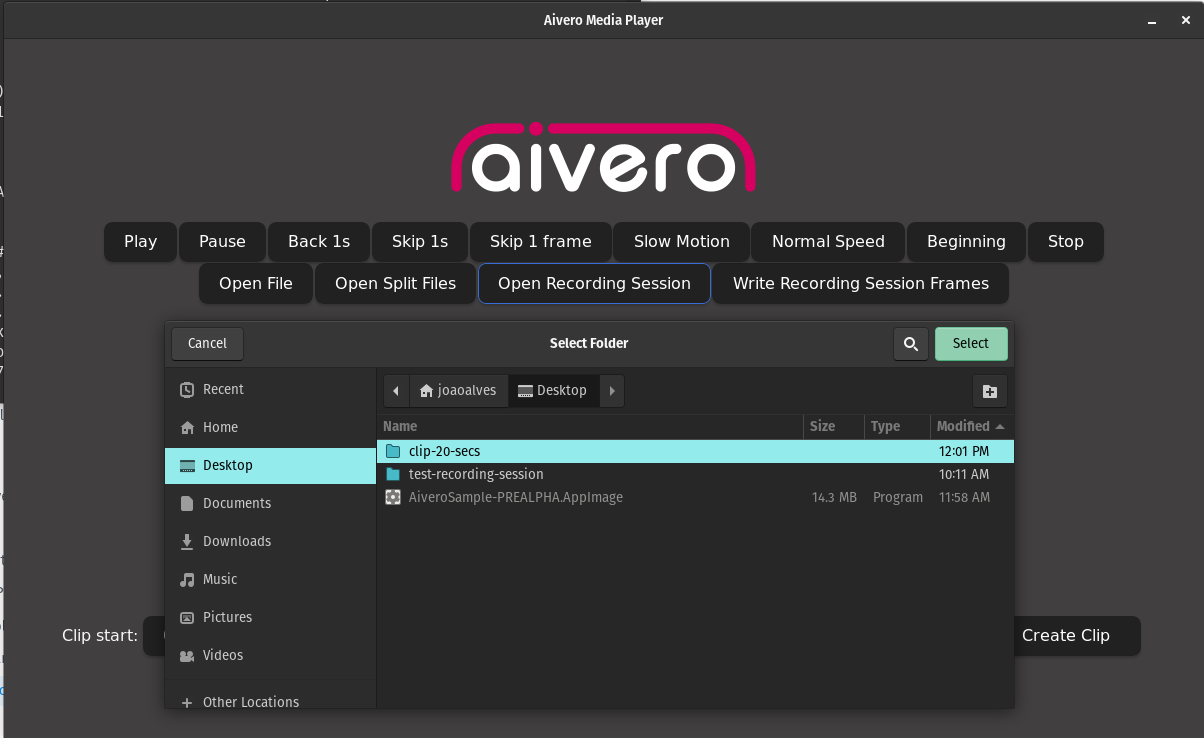
- To open a recording session please click
Open Recording Sessionand select the top level recording session folder and finally clickSelect.
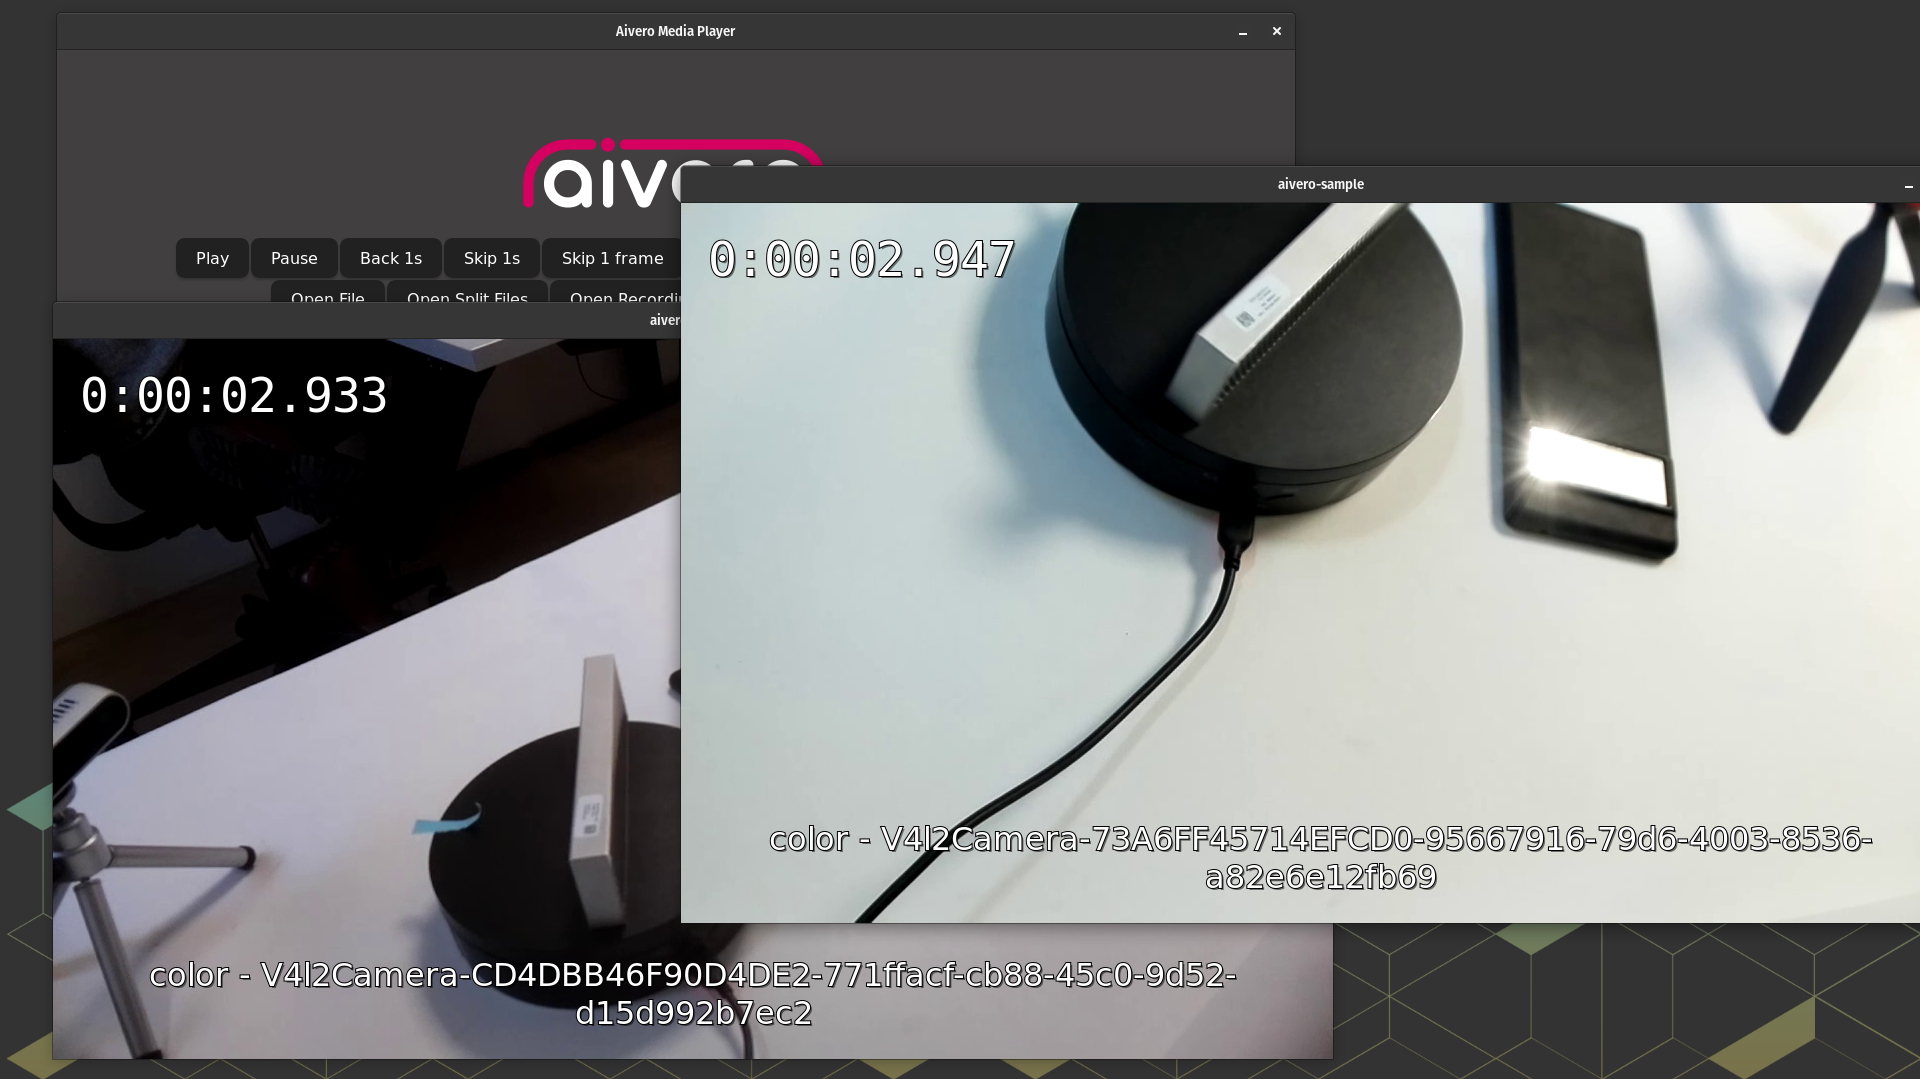
This should now open preview windows for each of your streams.
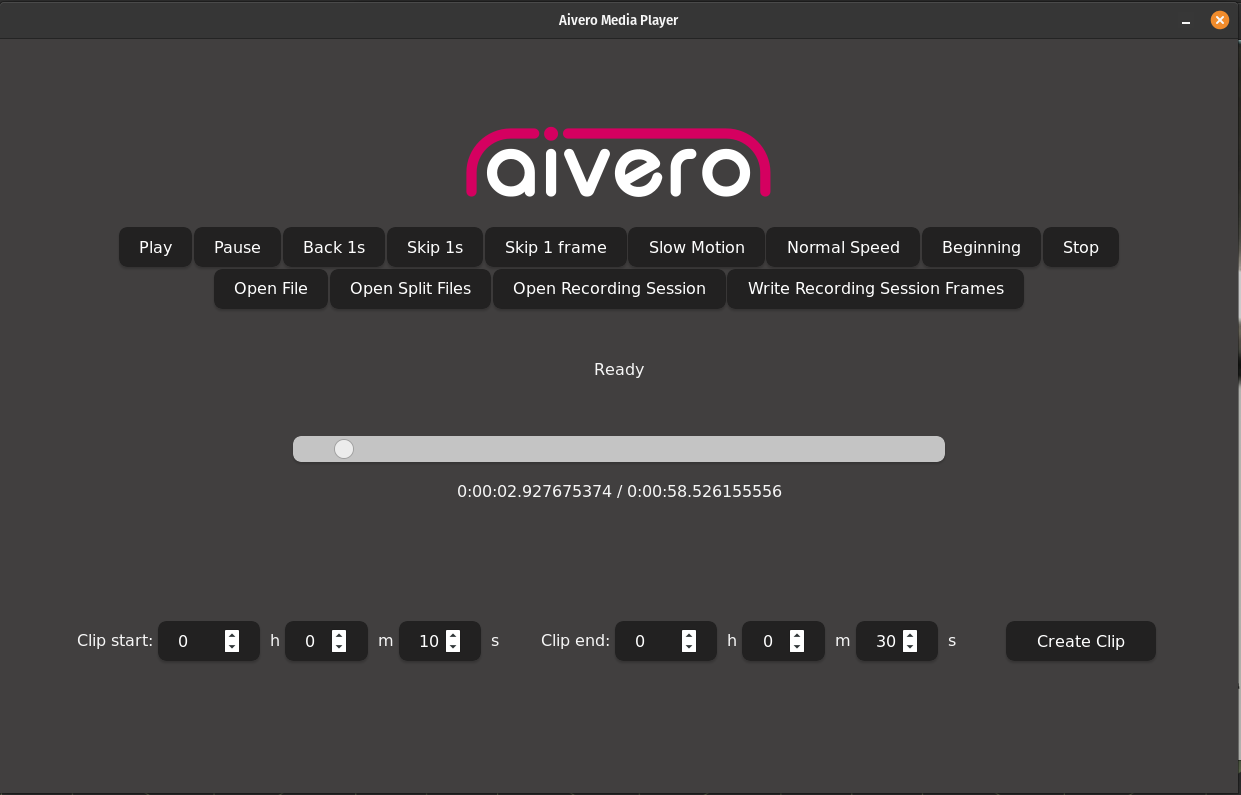
Creating a clip
To create a clip of the session, after opening a recording session, first select the Clip start and Clip end time stamps using the bottom forms.
E.g. creating a clip that runs from 00:00:10 to 00:00:30 and click Create Clip:
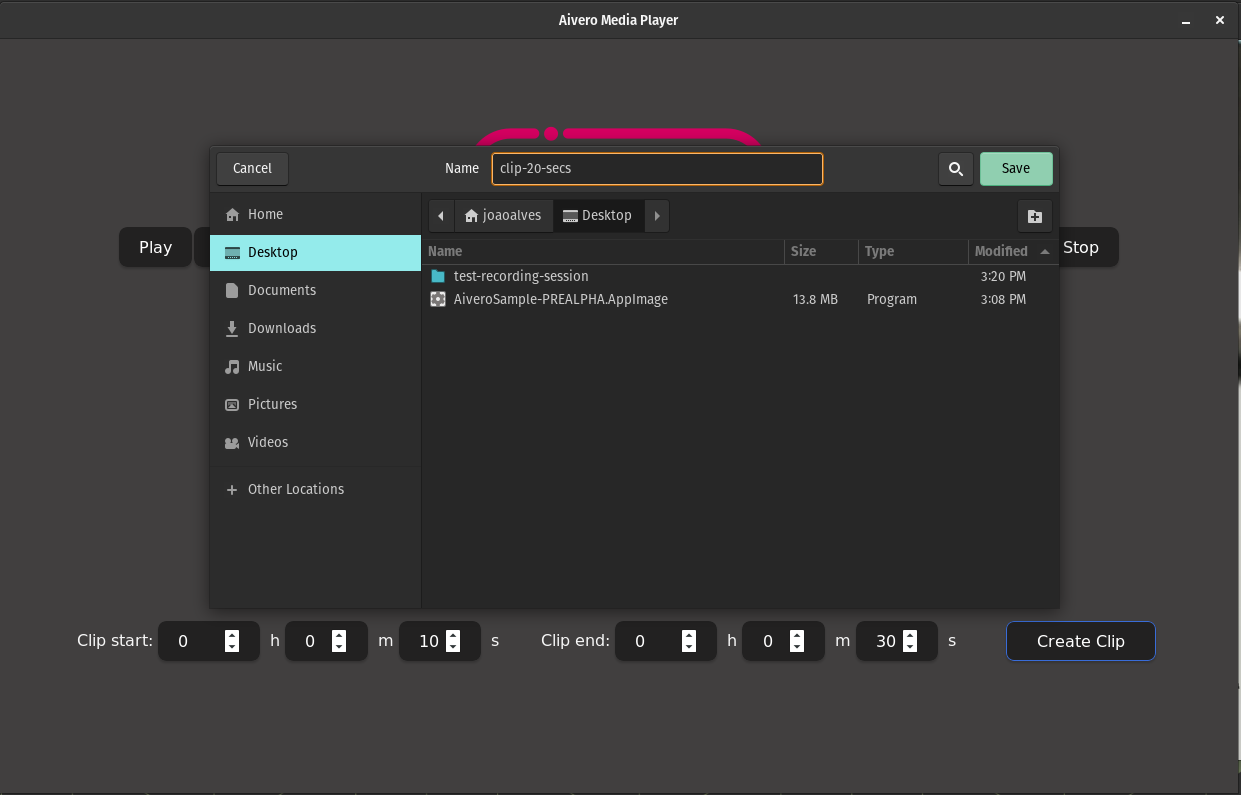
You will now be prompted to decide where the click should be saved. Just select a location and a folder with the same structure as the recording session with the clipped files will be created after clicking Save.
You can now find the clips inside that folder.
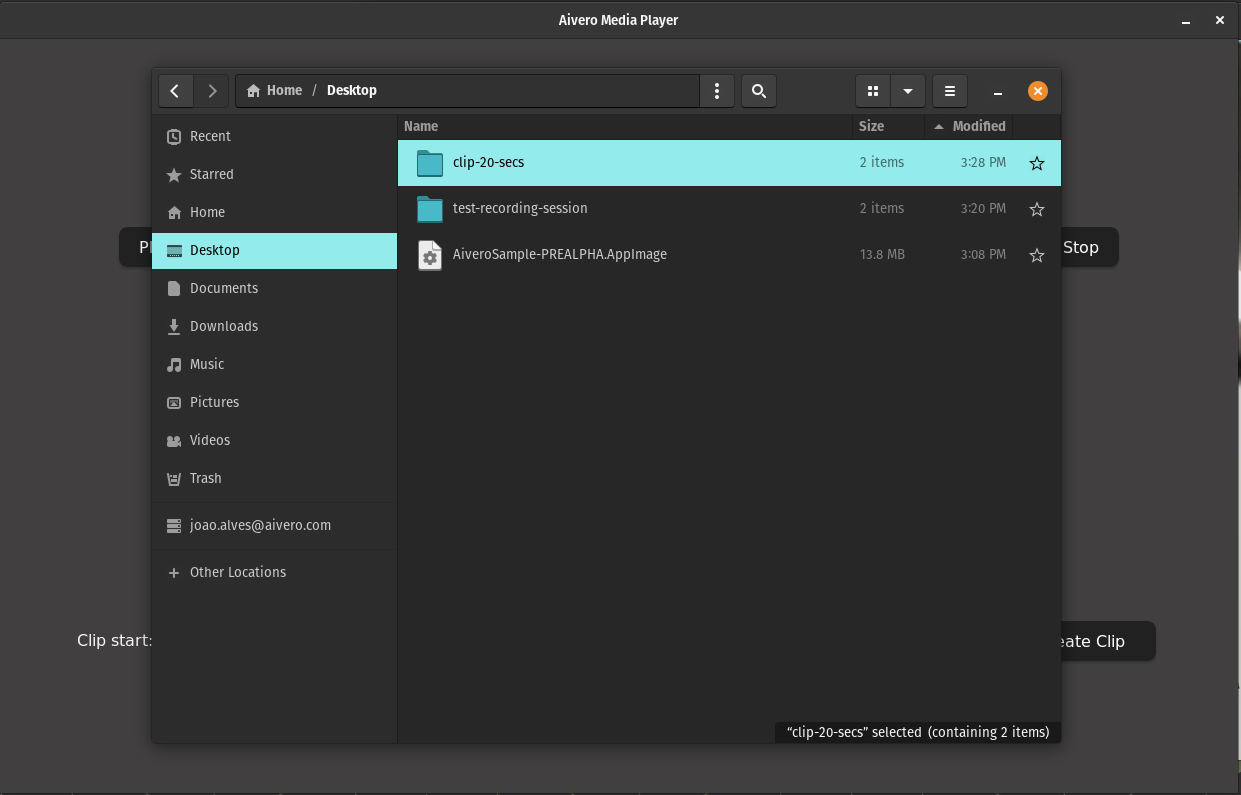
And done, you have created a 20 second clip of your recording session.
Writing clip to TIFF frames
First open your newly created clip as you would with any other recording session.
Then click Write Recording Session Frames and select where you would like to save the files.

After clicking Save your files can be found in the selected location in disk.
Updated 2 months ago