Aetina N510 TX2
he Aetina N510 TX2 can be flashed by using the jetson-flash utilities from provided by Aivero, while having the device connected to a host machine via USB, or via a micro-SD card using Balena Etcher.
USB+Aivero Jetson-Flash tool method
Pre-requisites
First, you'll need to setup the jetson-flash utility on your machine. You only need to run these next three steps when you get a new version of the DeepCore software.
- Download the OS flash file jetson_flash_tx2.tar.gz
- Extract this file in your computer
- Navigate to the newly extracted folder
cd /path/to/extracted/folder/deepcore-images - Load the utility into docker using
sudo docker load -i jetson_flash_tx2.tar
Setting device into recovery mode
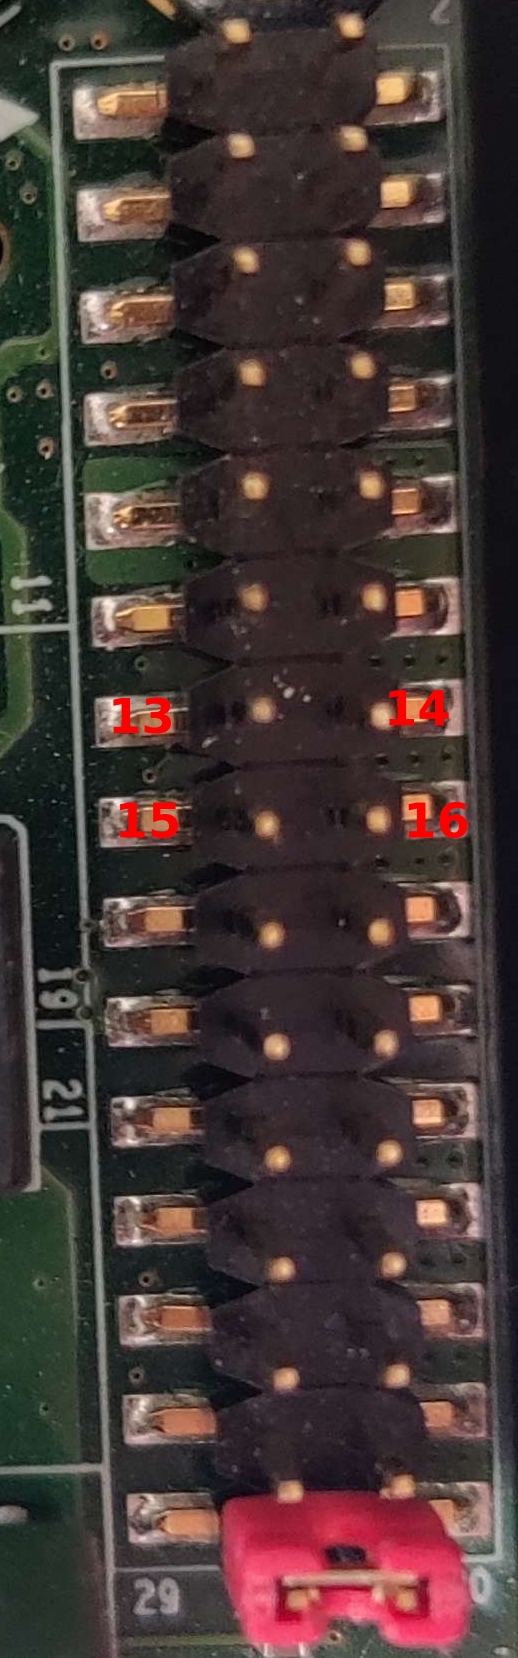
Your Aetina N510 TX2 board is capable of being being booted into a recovery mode, which allows it to be flashed, by shorting specific pins of the device.
Let's focus on the pins which are highlighted by the red square.
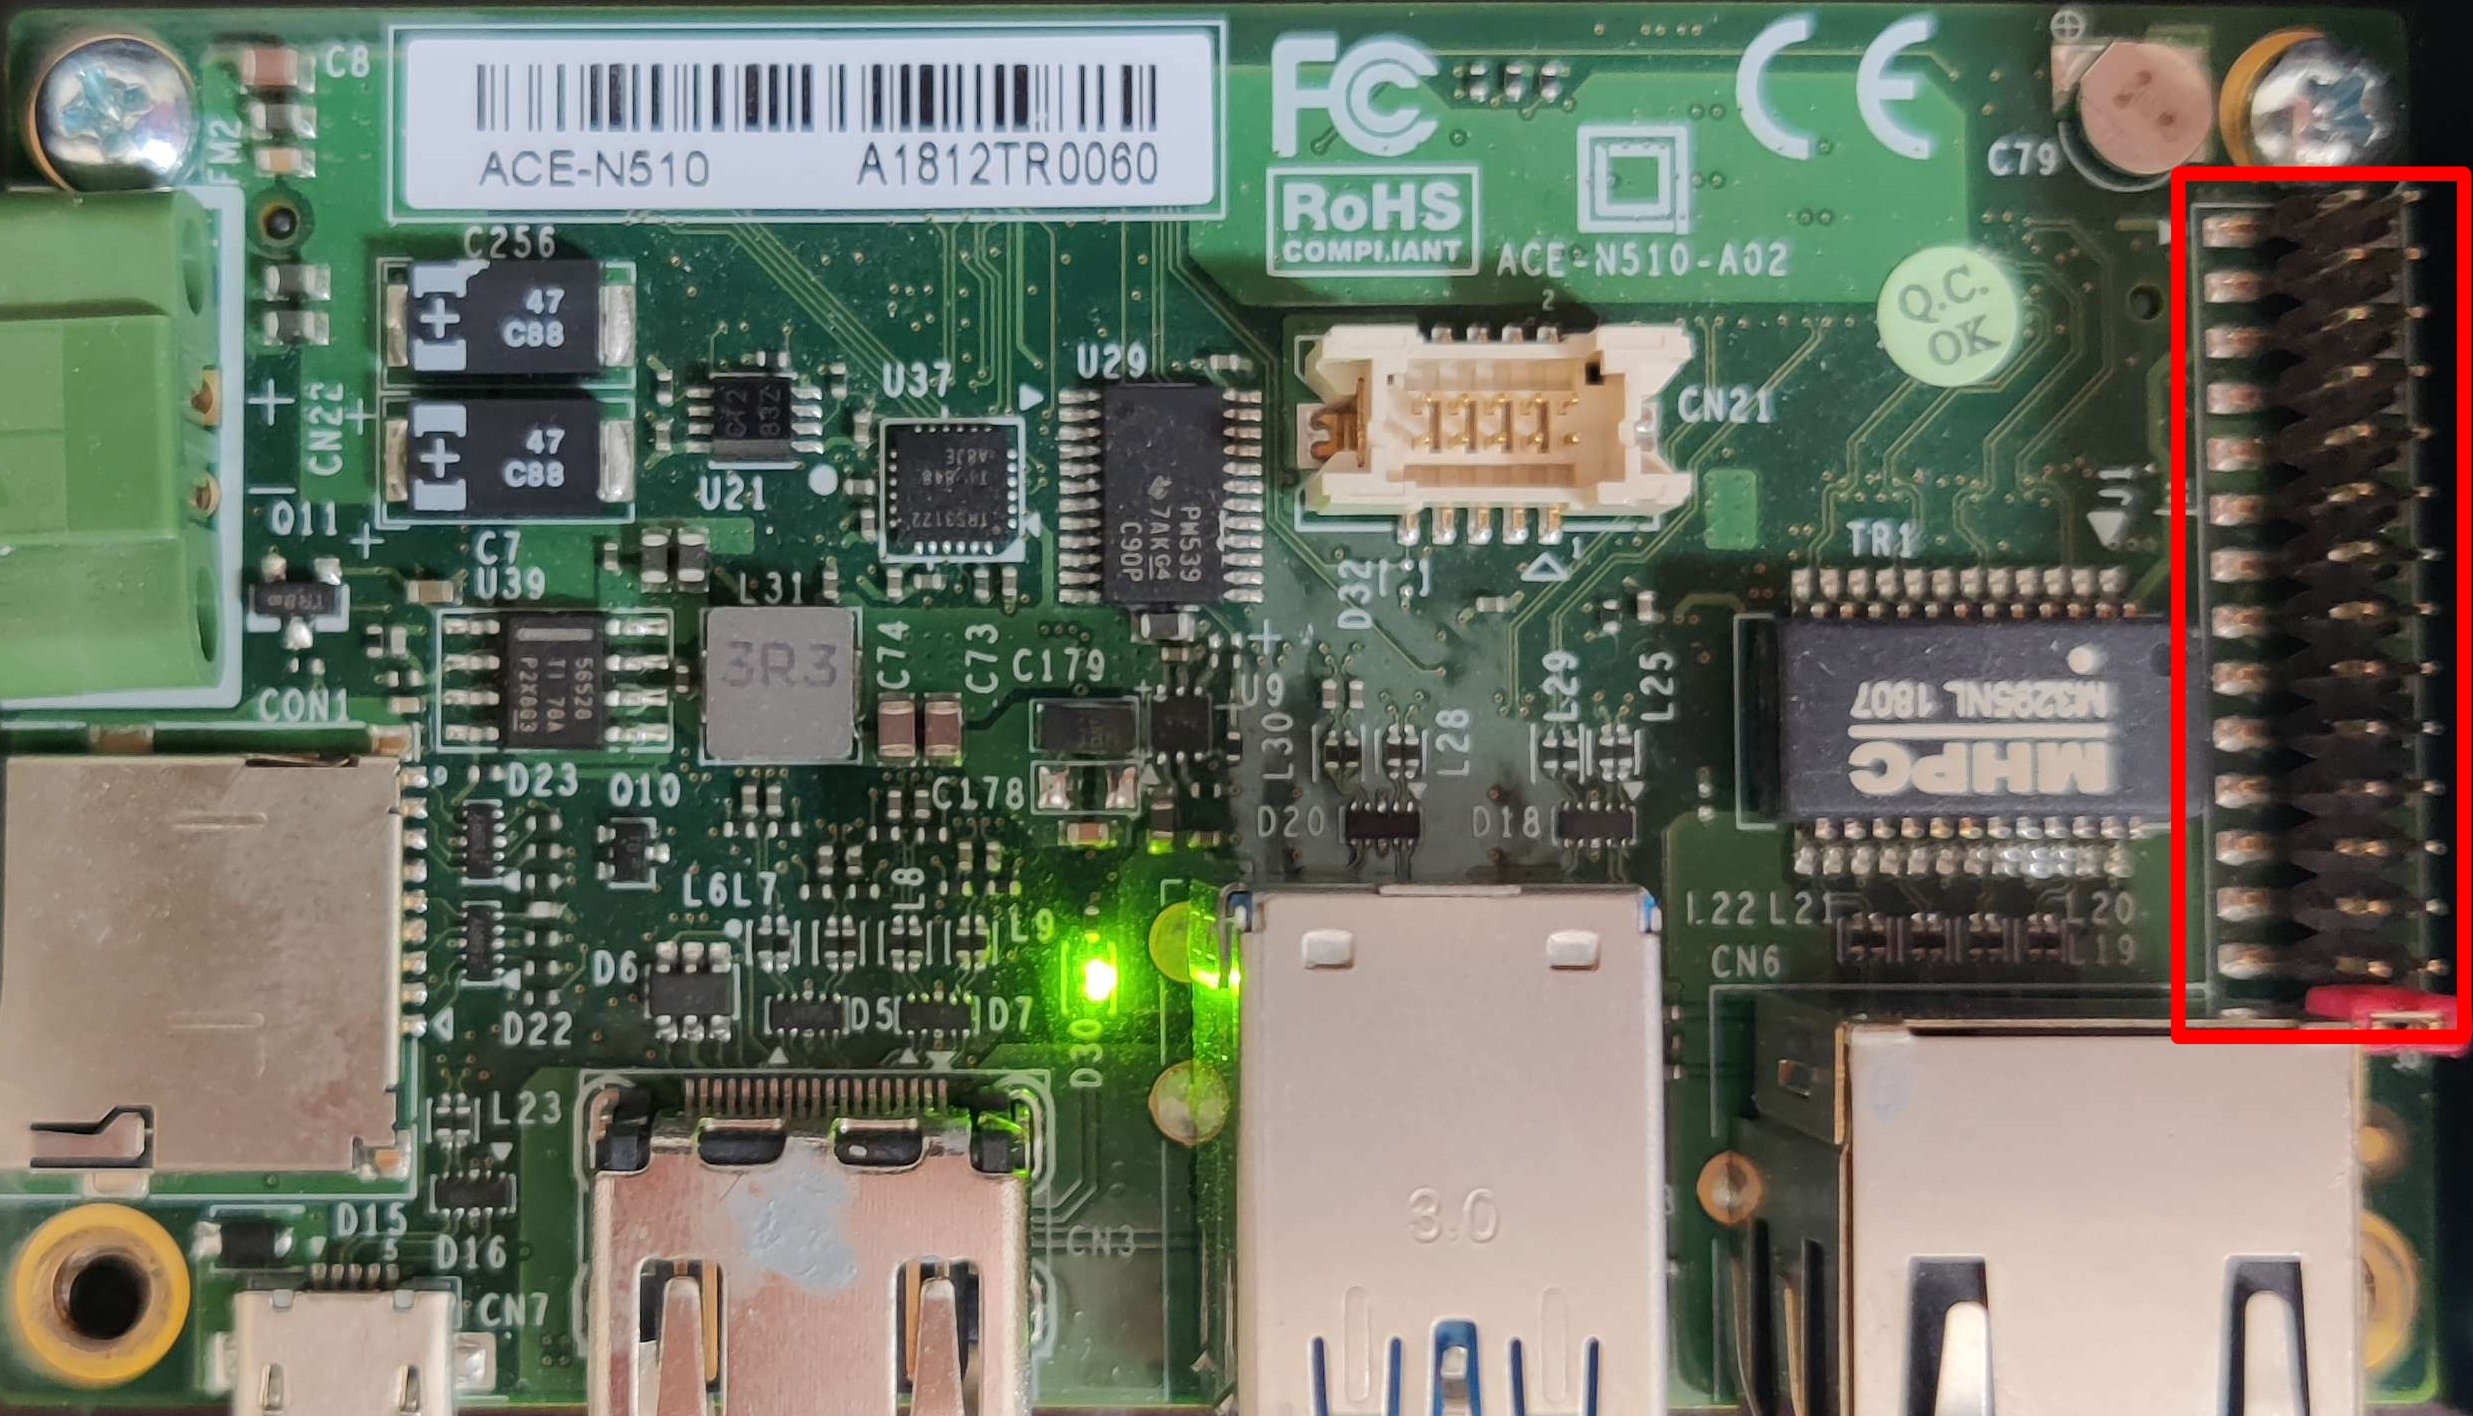
In those, we will want to short pin 15 with pin 16, in order to start the signal which informs the board that it should boot in recovery mode. You must hold the signal between these two pins until you reset the board, which can be done by connecting pins 13 and 14. The green light on the board PCB should have disappeared by now, which means you can disconnect pins 13 and 14. Only AFTER you have disconnected pins 13 and 14, can you disconnect pins 15 and 16, or the recovery mode booting sequence will fail. The schematics of the pins can be seen in the figure below.
Flashing the device
Now that the utility is setup, you can simply connect and flash different devices, by following these steps:
- Connect the Aetina N510 TX2 with a USB cable to your computer
- Set the Aetina N510 TX2 board into recovery mode (see above)
- Run the
jetson-flashutility withdocker run --rm -it --privileged -v /dev/bus/usb:/dev/bus/usb jetson-flash-tx2:latest - Wait for the utility to finish. A message will be printed in the terminal when it is safe to reboot the device.
Micro-SD+Balena Etcher method
Pre-requisites
-
Installation of https://www.balena.io/etcher/
-
Aetina N510 TX2 with Ethernet connection to the internet.
-
A deepcore image file provided by Aivero.
e.g. balena-cloud-release-linux-armv8-rpi-pi4-raspberrypi4-64-2.101.7+rev1-v14.0.13.img.zip
-
Access to a balena dashboard, provided by Aivero
deviceType
Copy/Flash the image onto a micro-SD card
We will be using https://www.balena.io/etcher/ to flash the provided image from your computer onto a micro-SD card of at least 4 GB size.
- Install etcher on your computer as per the link above.
- Open etcher and select the image file.
- Plug in the micro-SD card (you may need to use a micro-SD to SD card adapter)
- Select the SD card in etcher
- Click flash and follow the instructions.
- Once finished, remove the SD card and proceed below.
Boot
-
Unplug the DeepCore from its power supply.
-
Place the DeepCore such that the power socket is at the upper edge of the device or the shorter side of the D shaped HDMI port is facing towards the table.
-
Unscrew the 4 Torx screws on the top of the device and lift off the cover plate.
-
Locate the SD card socket located between the green power port and the back facing panel.

-
Insert the micro-SD containing the balena-os image provided by Aivero.
-
Without re-assembling the device, plug in the power supply. It will boot up and light up various LEDs inside the enclosure.
-
The device will flash the eMMC and power down again. This process takes 5-10 minutes.
-
During this period a new device will show on the Balena dashboard you have been invited to, indicated as preparing or flashing the OS.
-
Wait until the DeepCore has powered off and turned off the LEDs from (6).
-
Remove the SD card by pushing the card in, which will cause it to pop out. Now you can pull it out. Consider using a piece of sticky tape to give you leverage.
-
Reassemble the device.
-
Power up the device.
-
The newly created device on the Balena dashboard will show the device from (6b) as online.
You have successfully flashed a DeepCore v2.
Updated 2 months ago