What we will need:
- MikroTik Router connected to power.
- Ethernet cables.
- Either Windows or Linux machine with internet access to setup the router.
Setup Guide
Step 1 - Install Winbox on your machine
On the computer you are using to setup the router, please install Winbox:
- If on Linux please open a terminal and run:
sudo apt update
sudo apt install snapd
sudo snap install winbox
- No you can open Winbox from your applications menu.
- If on Windows please go to https://mikrotik.com/download and click the button marked
Winbox, download the installer and run it to install Winbox.
Step 2 - Connect machine, router and WAN
- Now let's connect a cable between your computer and
Port 2off the router.
🚧 Port 1 is reserved for WAN connection
Please do NOT connect DeepCore/DeepServer or other devices to Port 1 after the router setup is finished. This port is reserved for connecting your own network cable (e.g. from your office router).
Step 3 - Setup your computer's IPV4 Settings
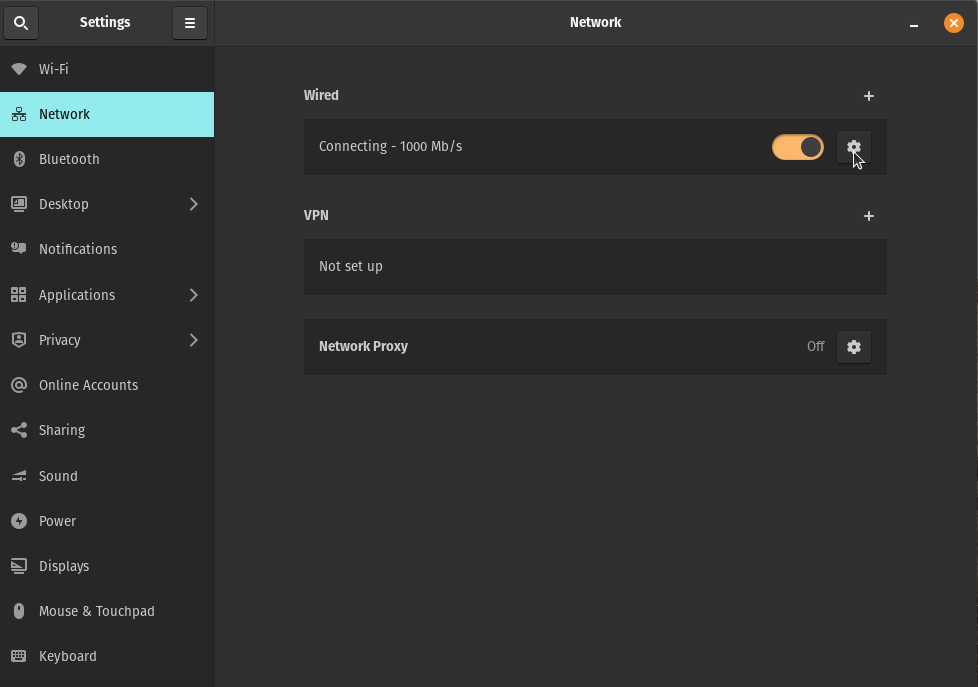
- On your computer edit the Ethernet connection by clicking the cogwheel in the Networks Settings page.
-
Then select the IPV4 tab and set the properties below:
- Set
IPV4 MethodtoManual - Set
Addressto192.168.88.243 - Set
Netmaskto255.255.255.0 - Set
Gatewayto192.168.88.1 - Set
DNSto192.168.88.1
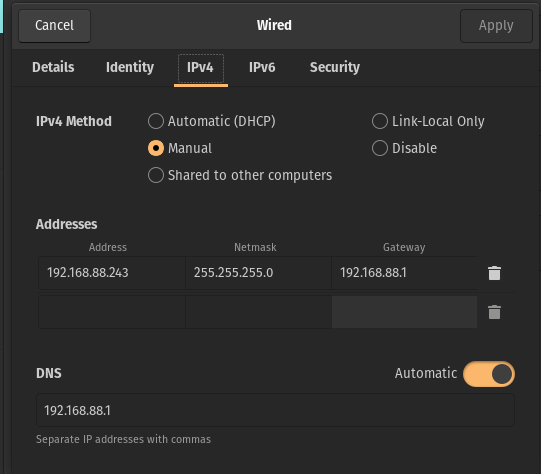
- Set
-
Finally click
Applyand reset the connection using the toggle button.
Step 4 - Connect to the router via Winbox
- Find the router MAC address. This address is usually on a sticker in the back of the router or underneath it. It should look something like e.g.
18:FD:74:E5:8D:85. - Open Winbox.
- Check the neighbors field - your router might just be there.
- if not: Input the router's MAC adress in the
Connect Tofield. - Set the
Loginfield toadminleaving thepasswordfield empty (in some routers the user password may beadmin/admin). - Click
Connectto login into the router.
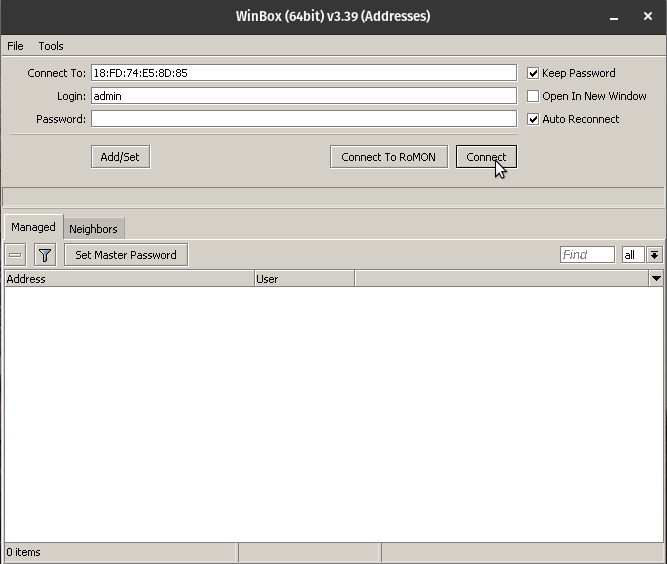
- If everything went correctly you should see the following screen.
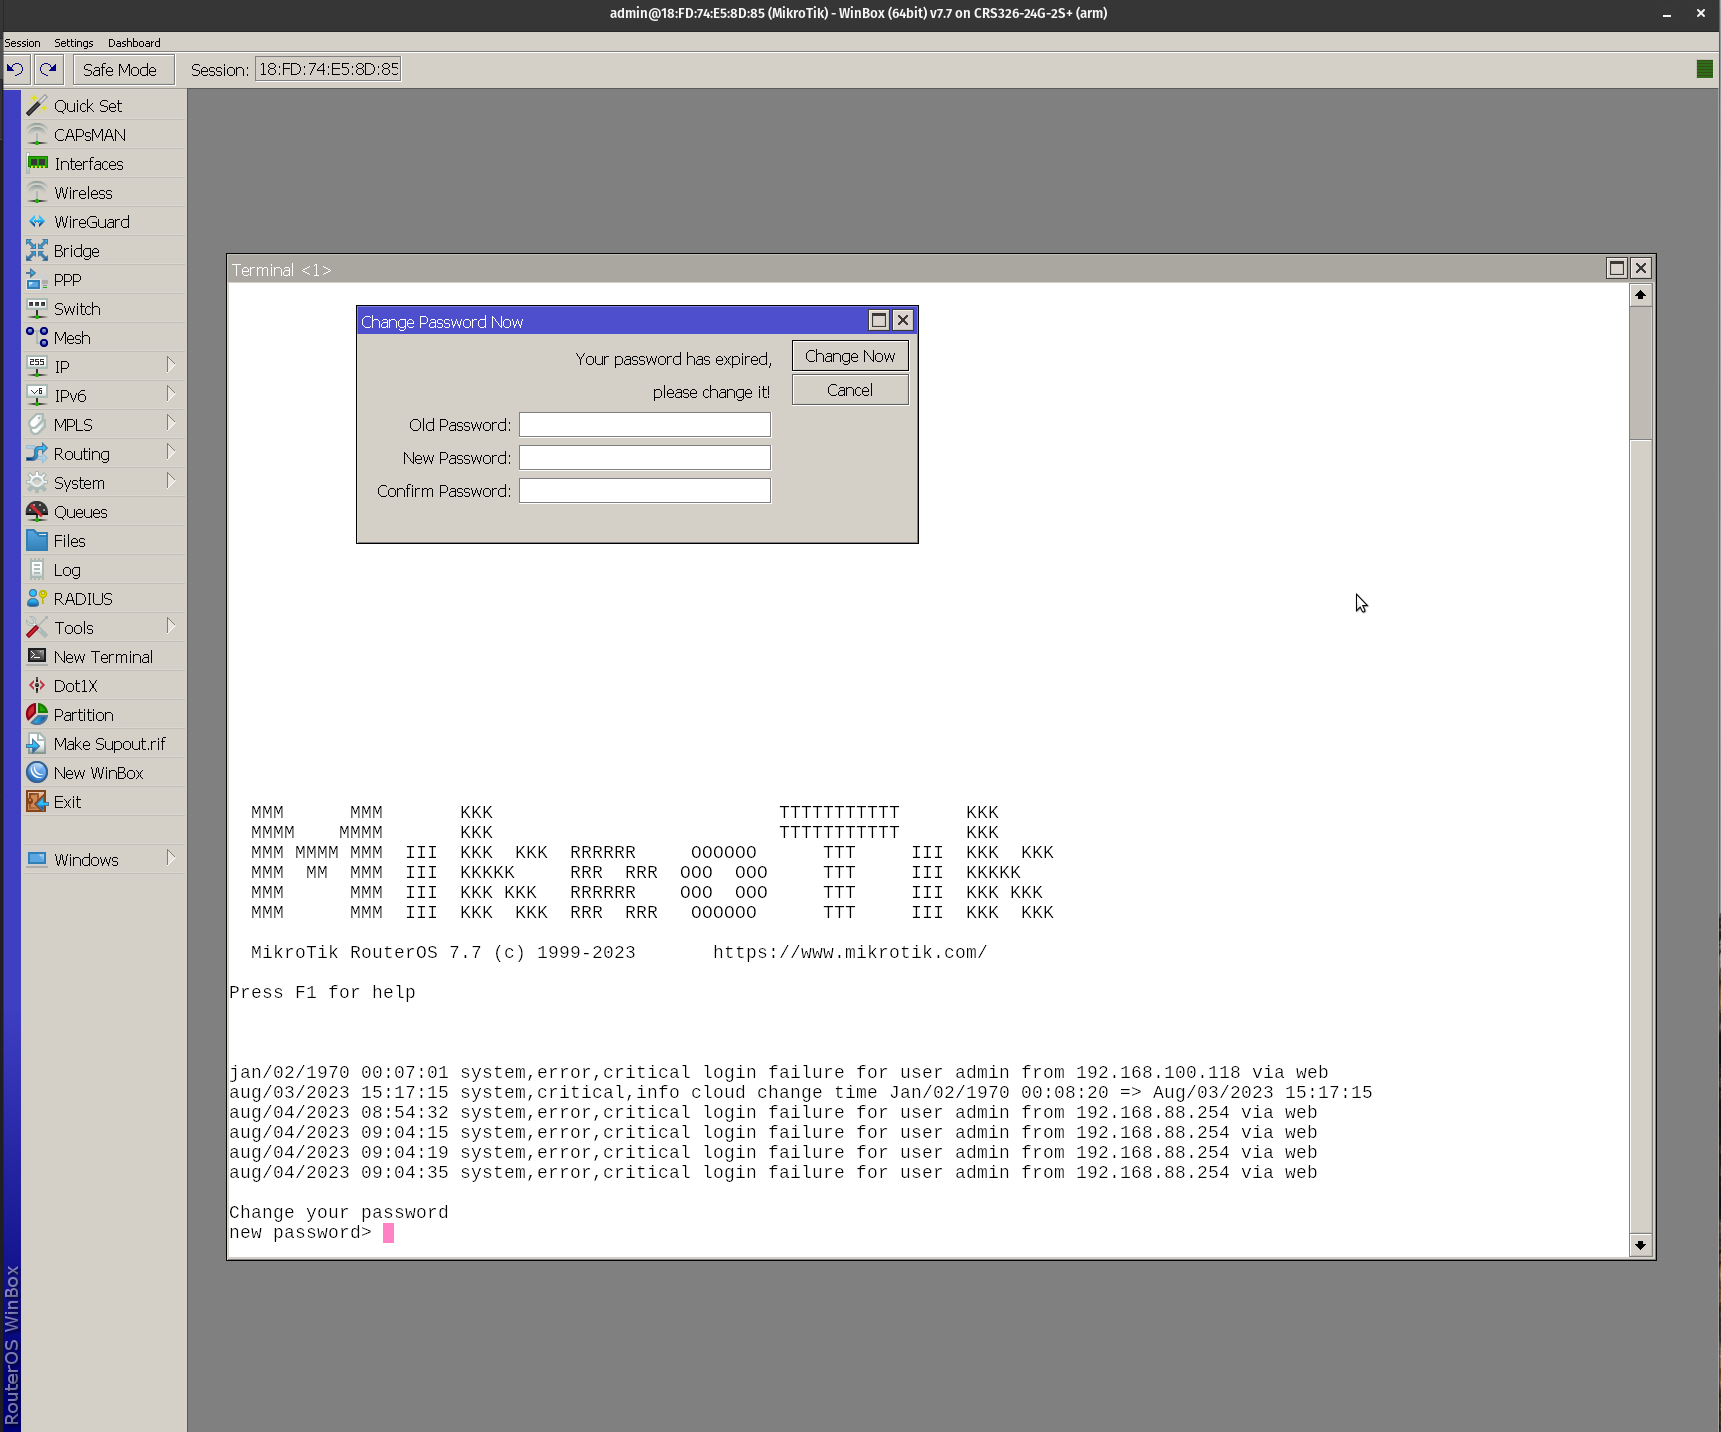
- Let's just close the
Change Password nowwindow for now.
Step 5 - Setting up router
Please click Quick Set on the top of the left-side menu. You should see something like this.
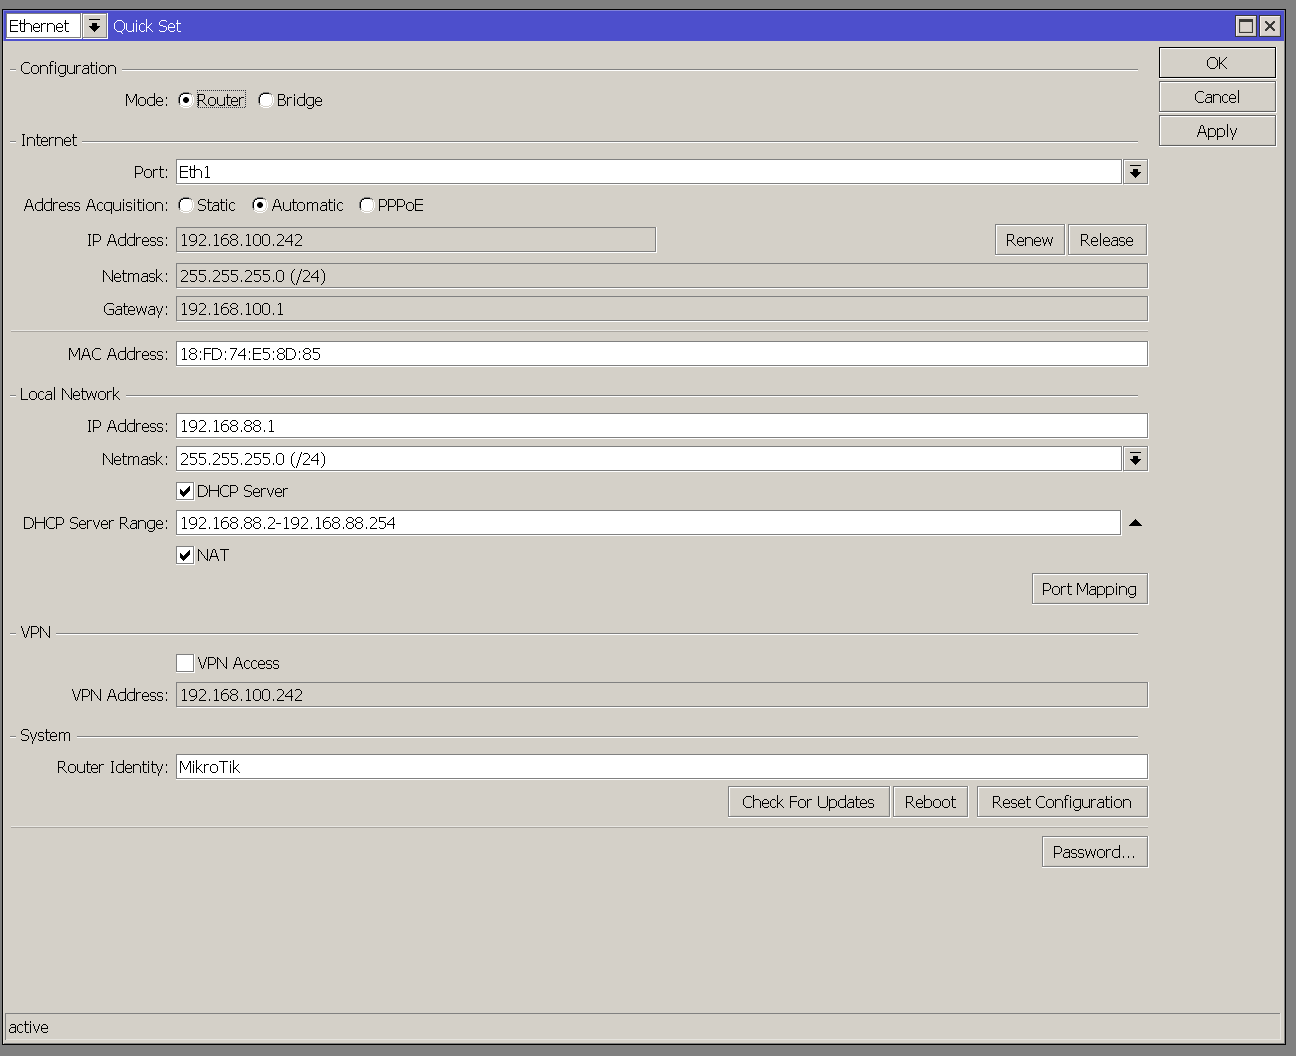
Please make sure to:
- Set
ConfigurationtoRouter. - Set
Address AcquisitiontoAutomatic. - Set
IP Addressto192.168.88.1. - Tick
DHCP Serverto enabled. - Set the
DHCP Server Rangeto192.168.88.2-192.168.88.254. - Tick
NATto enabled. - Click
ApplyandOk
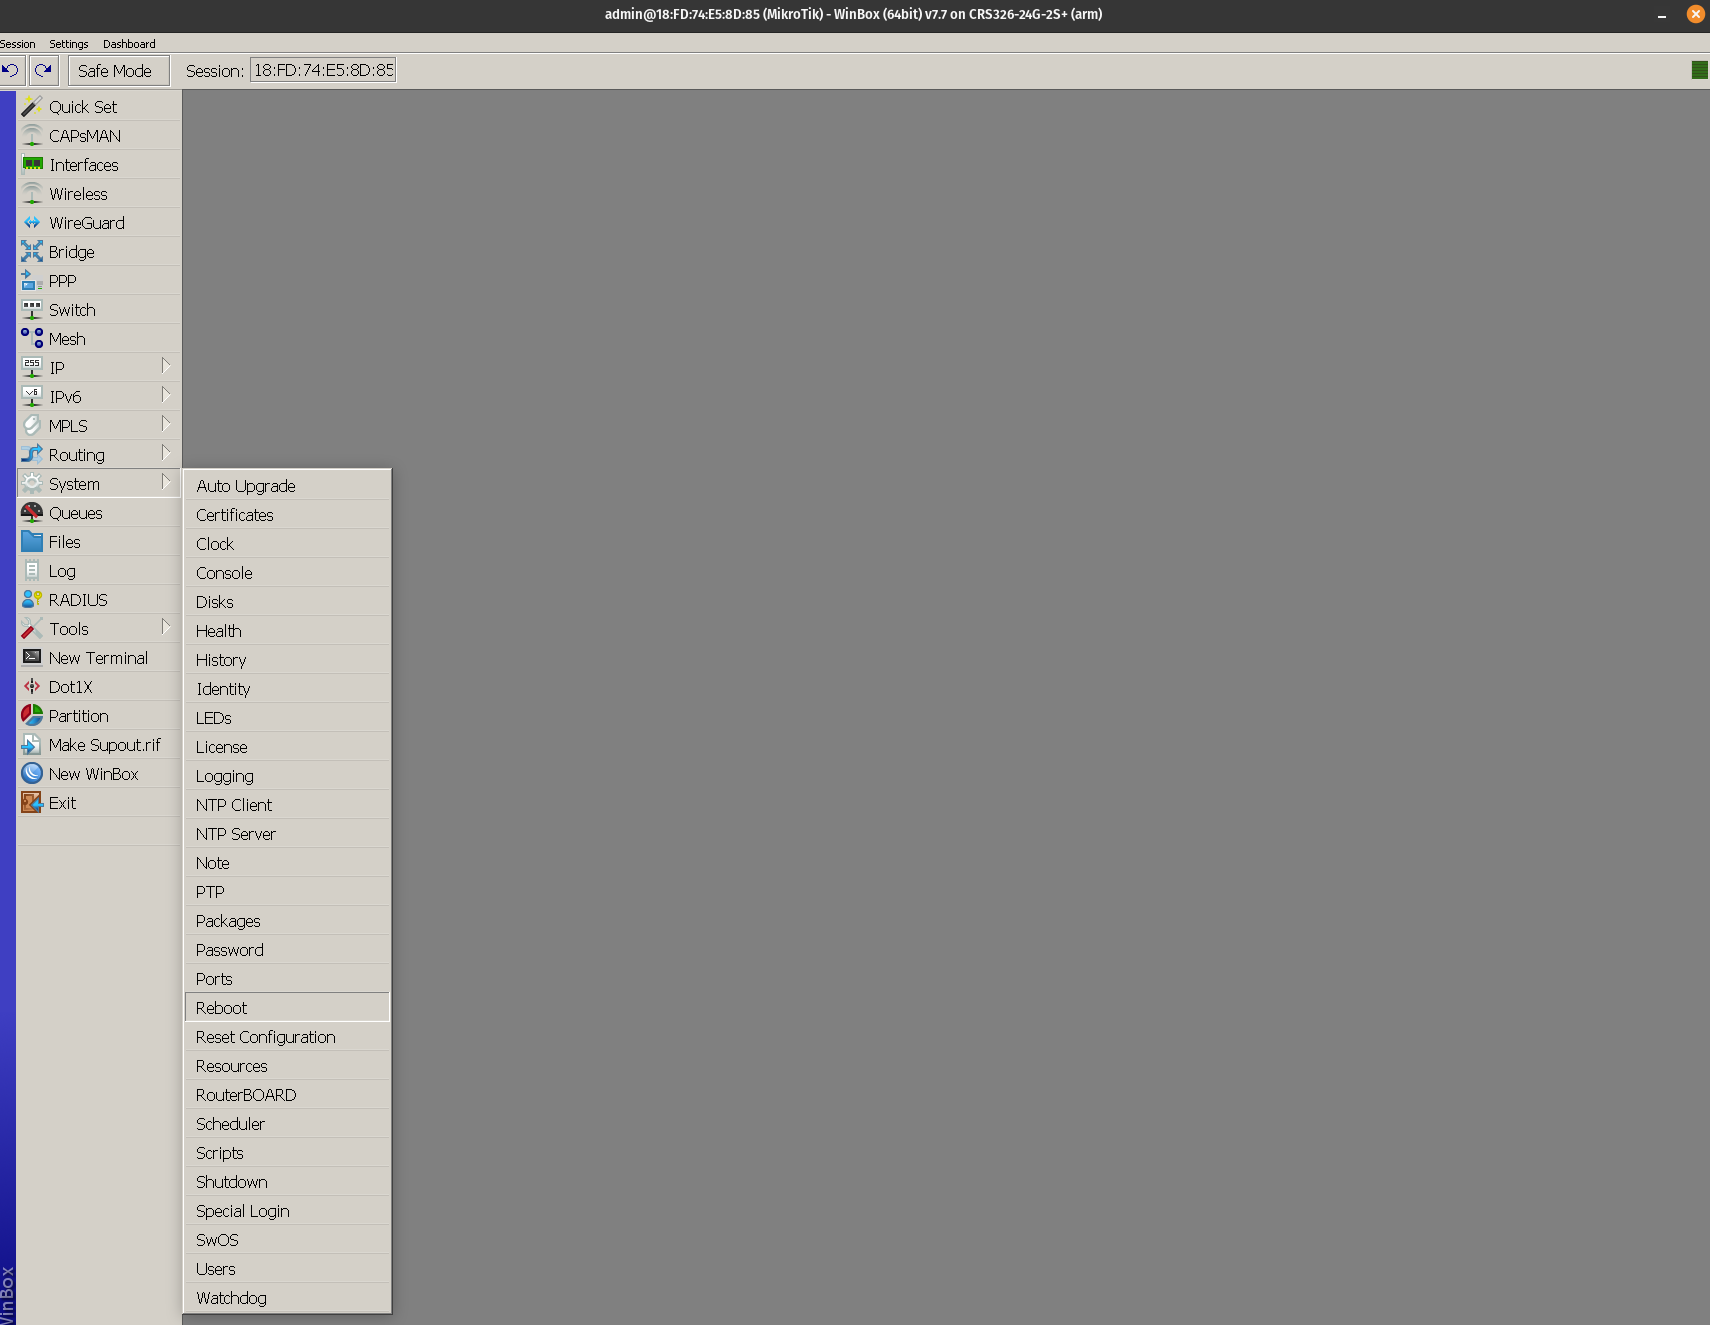
Step 7 - Reboot the router
- Click on
System->Rebooton the left-side menu and wait for the router to reboot. It will reopen the window once it has finished.
And done! After it finishes rebooting, please unplug and re-plug your machine's Ethernet cable.
Your router is now ready to accept new connections. You can close Winbox and continue to Setting up Aivero services on Router
If you would like to run the router air-gapped, please remove the WAN cable connected to port 1 of your router.
You can now connect the DeepServer machine and DeepCore devices to the router.
🚧 Port 1 is reserved for WAN connection
Please do NOT connect DeepCore/DeepServer or other devices to Port 1 after the router setup is finished. This port is reserved for connecting your own network cable (e.g. from your office router).
Checklist
👍 Check these:
- Check your ubuntu network to make sure your server has an IP in the correct IP address range (
192.168.88.2-192.168.88.254). You can do this in the network icon top right of your screen.- Check your ubuntu network to make sure your server uses the right IPv4 Gateway of
192.168.88.0